Pages

Showing posts with label Montessori - Practical Life. Show all posts

Tuesday, September 8, 2015

Montessori flower arranging: flower study part 4

Check out part 1, part 2, and part 3 of our Montessori-inspired flower study!


We are frugal flower pickers around here, so when I introduced this flower arranging lesson to Elise, I kind of expected her to go wild with the scissors in the garden.  Instead, she sniped just a few of her favorite herbs - parsley and mint - for an edible bouquet.  When I suggested she pick one of the "showier" flowers, she halfheartedly agreed, insisting that we leave the rest for the bees!

If you feel like the bees in your garden are adequately supplied with nectar and pollen, and you have a flower or two to spare, try this flower arranging lesson!  You'll build control and coordination of movement, as-well-as decision making skills.  Plus, nothing brings the beauty of nature indoors like a bouquet of cheerful, fresh flowers!

You'll need:
  • a basket for gathering flowers
  • scissors
  • a selection of small vases
  • a pitcher with water
  • a funnel
  • newspaper or other scrap paper for collecting leaf and stem trimmings
  • a drying cloth
  • coasters or doilies to place under the finished bouquets

First, bring your basket and scissors to the garden and select a variety of blooms (or herbs!) to pick.


Elise filled her basket with oregano and chive blossoms, parsley, echinacea, and gaillardia.  


Once you're back inside with the flowers, choose a vase to fill with fresh water.  If the vase has a narrow opening, use the funnel.


Spilled some water?  No big deal!  Use your drying cloth to wipe it up!


Select a bloom or two to arrange in the vase.  Trim the stems, and remove any leaves that are in the water.  These can go in the compost or trash at the end of the lesson.


Keep in mind the aesthetics of the bouquet, and don't overcrowd your vase with too many flowers!  Set the finished bouquets in a safe spot while you clean up your supplies.
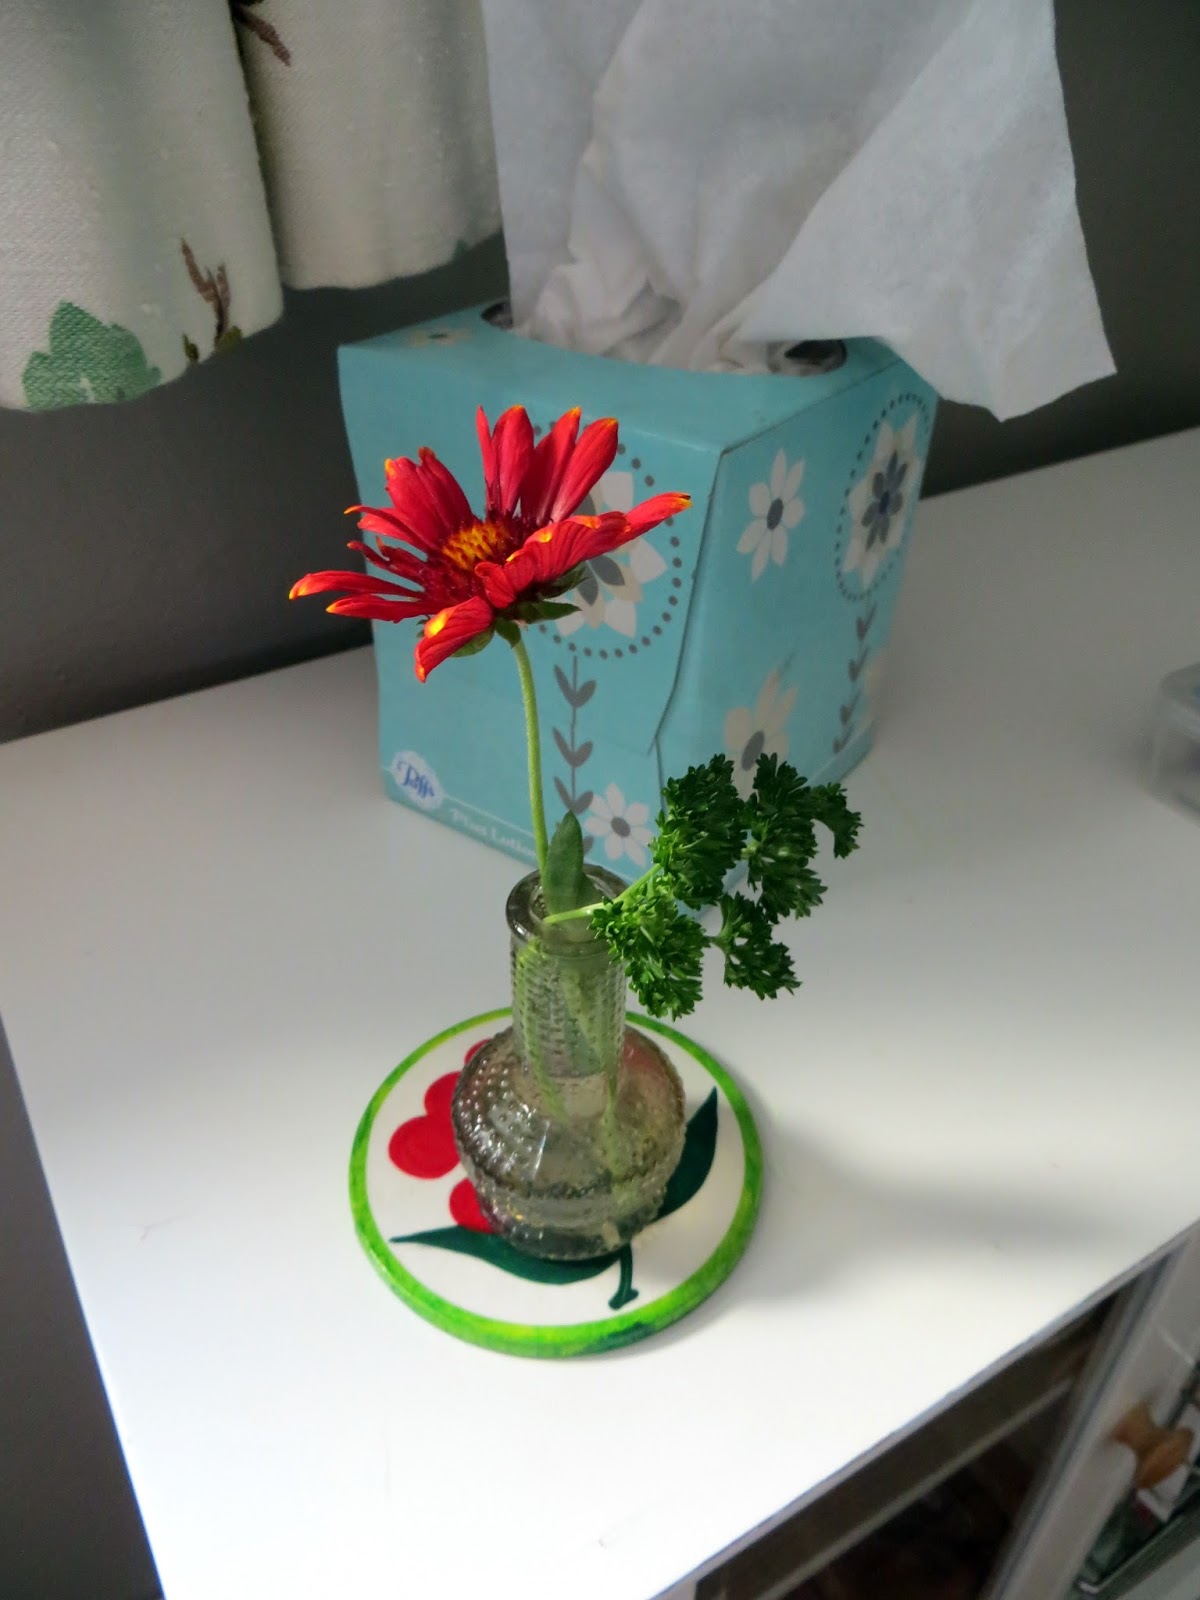

Finally, place the bouquets on coasters or doilies around the house.  Enjoy!

Friday, February 25, 2011

clip-on koalas


Are you tired of strengthening your fine motor control 
with those same old clothespins????
We have been loving these cute little koala clips!  When you squeeze their backs, their arms and legs open and you can clip them onto lots of things.  We have been clipping ours onto this wooden spice rack.  These koala clips are the perfect challenge for the child who is working to strengthen his pincer grip AND build coordination and control of his movement.  They are not easy to open - you really have to have strong fingers - but they are so much fun, even the littlest hands in our classroom will manipulate them all morning long.  

I remember having lots of  clip-on animals like these koalas when I was growing up.  The 80's were just rad like that, I guess.  I found some koala clips on amazon, but they seem a little on the spendy side to me.  Click here if you want to check them out. 
 
Does anyone have any other ideas where you can find animal clips?  
We want more!!!

Thursday, January 21, 2010

cracking nuts

Nut cracking is the thing to do around here lately!

Not only do the almonds, walnuts, and hazelnuts taste delish,

but their shells split open with a satisfying "CRACK!"

Unlike
apple slicing and lemon juicing,
there aren't a lot of steps,
so even the littlest ones are able to take a turn.

All you really need is a little elbow grease!


The materials:

a dish for holding the nuts
a nutcracker {I've seen them at thrift stores, too.}
a dish for serving the nuts
a crumber for sweeping up broken shells
an assortment of nuts
{Before doing this lesson, we made sure NO children had nut allergies.}

Because it's a food lesson,
the child washes his hands and puts on an apron.

Then, he chooses 4 nuts from a basket near the lesson on the shelf.
{There's a little sign on the basket that says "4."}
He sets his materials up on a mat and starts cracking!
The meat the child picks out of the shells is placed in a dish.
After the child has cracked all 4 nuts, he sweeps up the shells,
and puts the lesson back on the shelf.

At this point, the child can either serve the nuts to the other children,
or eat them himself.
The older children tend to choose serving,
and the younger children tend to gobble the nuts up themselves!
{This is slowly starting to change as they discover
the joy of sharing food, though!}

Friday, December 4, 2009

gift wrapping 101

As you probably already know,
I LOVE practical life lessons.

For one thing, there is a never-ending supply
of practical skills that one can learn.
{We're never short on inspiration when it comes
to putting together PL lessons for the children.}
Another thing I find fabulous about these lessons
is that they give the children so much independence!

My lovely co-teacher Christy came up with this
present wrapping lesson
that debuted in our classroom this week.

The children think it's genius.


First, a child chooses an ornament.
You can't tell from the photo,
but there's a variety of boxes and wrapping paper squares
for her to choose from, too.

The child carries the materials she will need
{ornament, box, wrapping paper, scissors, tape}
on a tray to a table.

Then, the wrapping begins.

The children have been very successful
with the taping...

and with the folding, too!


After the present is wrapped,
the child places it under a wreath in our classroom.
{We're hoping to acquire a tree soon!}
At line time, the children take turns unwrapping the presents
and hanging the ornaments on the wreath.
{We're using a list of names to keep it fair - VERY important!}

What has impressed me the most about this lesson
is the problem solving skills I've observed the children using.
This child is carefully cutting off the excess paper...

and this child is adding paper.
Having too much or not enough wrapping paper
is a problem that most gift wrappers encounter, right?
{I love seeing the different ways the children deal with it!}

At first, some of the children were frustrated that they couldn't
bring their carefully wrapped presents home...
but now, they've actually embraced the idea
of giving a gift to their classroom!

Hopefully, they'll take these skills home
and wrap presents for their friends and families, too!


Sunday, October 25, 2009

fabric lacing

The idea for this lacing activity came from Montessori Mama.


A small group of children laced squares

of upholstery fabric onto ribbons.
Some ribbons were threaded with needles, some with buttons.


The work was so satisfying,

I couldn't prep the fabric fast enough!

{I was cutting upholstery samples into small squares,

then cutting a slit in the middle.}

Here are some of the uses the children came up with for their creations:

cat toy
fishing line
necklace
snake


Friday, October 23, 2009

lunch...

...according to the Food Guide Pyramid.

The children have really enjoyed using the Food Guide Pyramid to sort the items in their lunchboxes during the morning work period.

The rug is just a regular working rug with the outline of the Food Guide Pyramid taped on with colored tape.

I just realized that we're using an outdated version of the pyramid!
Check out the new one here.

Oh well, the children haven't really been concerned about the number of servings...

They're more excited to find out if they have something in their lunch from each of the food groups...
and that applesauce comes from apples and apples are fruit...
and that dessert is O.K., it just goes last!

Thursday, October 22, 2009

yeah, snack!

After hemming and hawing
{for the past several months}
I finally gave our snack area an upgrade.

Check out the before photos here.

after...

This morning, in addition to the snack, I set out 3 tubs...
{one for washing, one for rinsing, and one for drying}


The children have always been able
to help themselves to a snack during the work period
{the numeral cards tell them how much to take}

and now, they're able to wash their own dishes, too!
{How independent!}


Finally! A real purpose for the soap suds!
{This lesson was off the hook today, by the way.}

Friday, October 16, 2009

two variations...

of two favorite lessons:

The children arrived at school and discovered
that their snipping paper
{strips of colored copy paper - some with lines, some without}
had been replaced by paint color swatches!
{donated to the school by an interior decorating mama}

Their sponge squeezing bowls
{two ceramic cereal bowls}
had been replaced by abalone shells!

The children were pleased to discover that
paint swatch strips are really fun to cut.
{The paper is nice and thick, and it makes a satisfying sound as it's cut.}
Right now the children are just cutting snips to cut snips.
{I plan on adding the option of glue and paper later on,
so they can use the snips for mosaics.}


The children quickly realized that the abalone shells are a little wobbly,
so they have been extra careful with their sponge squeezing.
{The nooks and crannies of the shells and their beautiful iridescence
have made up for any spills the children have had to wipe up!}

Thursday, October 15, 2009

apple slicing


Food lessons are sort of the pinnacle of the practical life curriculum in our classroom. A lesson like apple slicing requires coordination and control, organization, sequencing, problem solving, and social grace.

Only a few children in the class are capable of a lesson like apple slicing. You might think that this would disappoint the other children, but instead, it inspires them to practice the lessons that come before apple slicing. They eagerly pour, scrub, and spoon, knowing that their work is preparing them for some really fabulous food lessons! :)


What you'll need:
  • 1 medium-sized bowl (for washing apples and cleaning up)
  • 1 small bowl (for waste)
  • scrub brush
  • cutting board
  • knife (we use pumpkin carvers)
  • water pitcher
  • serving plate
  • toothpicks
  • cinnamon
  • drying cloth
  • apples!


First, the child fills the pitcher with water and pours it into the bowl.
(Prior to this, he's washed his hands, put on an apron, and set up his workspace.) He uses the brush to scrub the apple and the cloth to dry it off.

Saw! Saw! Saw!
Although it is only a pumpkin carver,it is still fairly sharp. The child in these photos has been shown how to handle a knife with great care. If only you could see the concentration on his face!


Next, the child removes the core. This goes into the small waste bowl, which he'll empty when he cleans up.


After arranging the slices on a plate, he sprinkles them with cinnamon. Yum!

He skewers them with toothpicks - this makes serving the slices a snap!

The apple slices are set aside in a safe location while the child cleans up. Not only does he wash and dry everything, he restocks the tray with a clean serving dish and drying cloth, so the lesson will be ready for the next child.


Ta da!!!
He radiates pride as he offers his classmates the fruits of his labor.

"Would you care for an apple slice?"


Wednesday, October 14, 2009

spooky spooning


Using a slotted spoon to sift Halloween spiders

out of a bowl of rice is delightfully spooky.

{AND a little messy, but that's what crumbers and brooms are for!}


What you'll need:


2 bowls
slotted spoon
rice
spiders

The spiders are those plastic spider rings, with the ring part cut off.
I plan on swapping the white rice for some colored rice soon.

{I think orange spiders with black rice would look especially eerie!}

Tuesday, September 29, 2009

hand washing

In a classroom filled with kids and teachers,
it is imperative that we wash our hands

A LOT.

Usually, it's 30 seconds at the sink
with that orange antibacterial goop,
but every once and awhile it's nice to slow down,
bring out the french-milled soap,
and turn it into an elegant affair. ;)


What you'll need:
  • soap (the fancier the better) & a fingernail brush in a dish
  • pitcher for warm water (Do you remember what the red line says?)
  • hand towel
  • mat (to organize materials and to catch any stray splashes of water)
  • basin
  • delicious hand cream


As I observed this child washing her hands,
I realized that she was having a special experience.
Not only did her body relax as she concentrated on her task,
but she took the time admire all the tiny details on her hands.
Taking a moment to care for herself became meditative and intimate.


I can't say exactly how this child felt
as she dried her hands and rubbed cream into her skin,
but I can tell you that after I took my turn,
my fingers were literally tingling with joy...
okay, you're probably thinking
cheesy!
but seriously, people,

it was like a Montessori spa!

Wednesday, September 9, 2009

color mixing II

Here it is...
color mixing II:


This lesson requires
organization,
fine motor control,
commitment,
and sometimes a little problem solving.

It's pretty much a
big deal
around here!


The set-up for color mixing II
is the same as color mixing I,
but instead of using only two colors,
the child must use all three.

Here are the color ratios, clockwise from the top:
  • 4 yellow
  • 3 yellow :1 red
  • 2 yellow : 2 red
  • 1 yellow : 3 red
  • 4 red
  • 3 red : 1 blue
  • 2 red : 2 blue
  • 1 red : 3 blue
  • 4 blue
  • 3 blue : 4 yellow
  • 2 blue : 2 yellow
  • 1 blue : 3 yellow

The child mixes the colors together with a toothpick...


...carefully places a white paper towel over the top,

and viola!

a spectrum of colors!

primary, secondary, and tertiary!

* I'm not sure who to give credit to for these brilliant color mixing lessons... they were already in my classroom when I started teaching. I have had to remake the color mixing cards over the years because the children use them so much!

Tuesday, September 8, 2009

color mixing I

There's always a little magic in the air
when a little one watches
two primary colors mix together...

This is one of the lessons
I would do on repeat
if I were 4. :)


Color mixing on the shelf:

What you'll need:
  • 3 eyedropper bottles filled with red, yellow, and blue (diluted food coloring or liquid water color both work well)
  • toothpicks for mixing
  • white paper towels
  • laminated color mixing cards
  • a damp sponge for cleaning up
This is my best picture of the color mixing cards! Hopefully, you can kind of get the gist of them through the glare! First, I drew circles on sheets of computer paper (cut down to squares). I used stickers to mark the color quantities, wrote the numerals next to each quantity, and then ran everything through the laminator. Don't worry, the quantities do not have to be exact - just keep in mind that one card should make shades of orange, one shades of purple, and one shades of green.
red and yellow make orange
red and blue make purple
blue and yellow make green

The child selects the color she needs,
and droppers the appropriate
amount onto the card.


Then, she mixes the colors together with a toothpick.


Finally, she lays a white paper towel over the mixed colors
and presses down gently.

ta da!

The primary colors have been replaced by
different shades of a secondary color!

green!
orange!
purple!

Of course, I don't say this or anything at all, really.

I hold my tongue and let the child have her
experience
in color mixing.

I'll share photos of color mixing II (the spectrum) tomorrow!

Related Posts Plugin for WordPress, Blogger...