Pages

Showing posts with label ooey gooey projects. Show all posts

Monday, December 8, 2014

the gift of play dough


Homemade play dough has become our 
go-to gift for friends.

It's inexpensive and easy to make.

The recipient will have a ball 
while strengthening his or her fine motor skills.
(Sorry - once a Montessori teacher, always a Montessori teacher!)

Ultimately, it can be composted or thrown away, the container recycled.

Plus, nothing beats giving a gift that 
you made with your very own hands, right?!!
(Just ask Elise - she was nearly bursting with pride 
watching her friend unwrap the snowman on the left 
- she made the one on the right for herself, of course!)


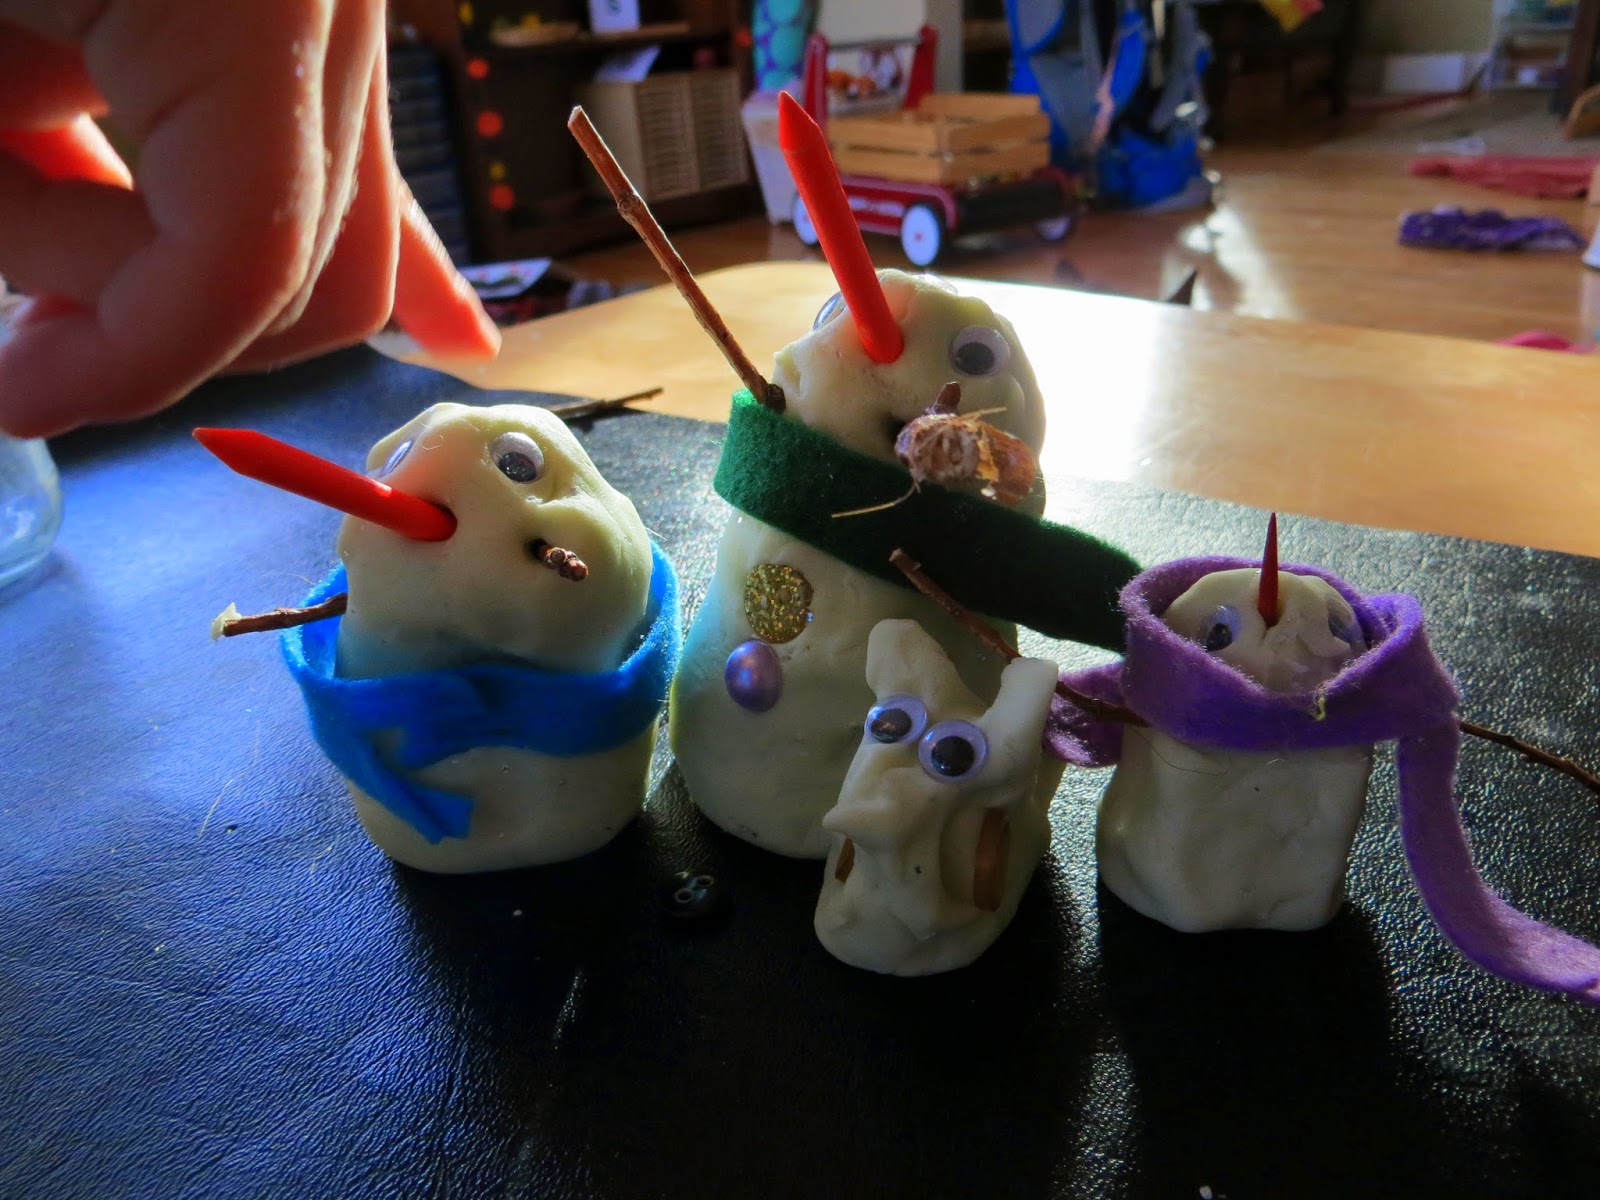
To make the snowman play dough,
and kneaded in some silver glitter and a splash of peppermint extract at the end.


In addition to the sparkly dough, we put together a few snowman supplies:

buttons,
googly eyes,
twig arms,
felt scarves,
and carrot noses (cut golf tees and toothpicks).


Of course, we had to put the snowman play dough in snowman jars
- thank you Eltern vom Mars!

In the photo at the top of the post, the jars are wearing knitted hats,
but if you're not a knitter - or you just don't want to spend your precious time knitting hats for jars -
try cutting off the toe of a single sock and gluing a pom pom to the top.
(The sock hat pictured above came off an extremely cute, child-made sock snowman 
we purchased at a craft fair this weekend.)

Happy gifting!


Wednesday, March 19, 2014

finger painting with a toddler: a simple first art activity


Remember those fun language games we've been playing that come
BEFORE practicing the letters of the alphabet?

Yes? If not, please check them out here!

Well, this week, we decided to try out an art activity that comes
BEFORE using crayons, markers, pencils, etc...

finger painting!


A few weeks ago, I read a post on Montessori in Mars 

Her words really resonated with me because
I'd been feeling some pressure from friends and family - even E's doctor -
to have her drawing with crayons and making "crafts."

While I am really excited for her to do those things,
I don't feel like she's quite ready yet...

She still uses a fisted or palmer grip - which is natural,
I just don't want her to become accustomed to holding a pencil this way.
Also, she still takes bites off pencils, erasers, and crayons - yum! ;)


[Young children] appreciate how they can easily see the color/s on their paper, unlike the light lines that they tend to end up making with crayons because they have yet to develop stronger fine motor skills." - Teacher Mars


Elise is interested in making marks on paper with writing utensils, though,
so we haven't been avoiding them altogether...

Instead, I've been trying to offer her lots of other opportunities to strengthen her fine motor control:


We tried out the Imagination Tree's Homemade Edible Finger Paint Recipe.
Not only did it turn out great, but it was REALLY fun to make.
(FYI, the magic happens when you cook it!)

Here's a little more finger paint inspiration from around blog land:

Wednesday, February 26, 2014

cloud dough


 In case you didn't already know,
we are big fans of DOUGH around here!

It's inexpensive and easy to make,
appealing to the senses,
and incredibly effective at strengthening fine motor control.

Oh yeah, AND it's FUN!!!


We've been enjoying The Imagination Tree's 4 minute play dough so much lately,
we decided to give their cloud dough a try, too.

Have you ever made cloud dough?

It's really simple - just flour and oil.

(We added a little glitter, too, so I told Elise it wasn't safe to eat...  
as you can see, she couldn't resist a taste here and there when she thought I wasn't looking!)


Elise was instantly enamored with the texture.

I, on the other hand, kept expecting it to feel like regular play dough,
but it was actually more comparable to wet sand.

Like wet sand, cloud dough is great for making imprints.

We tried shells, stones, and twigs,
but Elise was happiest just digging her fingers in...
and her toes...


and eventually her entire body!

7 cups flour
1 cup vegetable oil or baby oil
glitter!

* We only made half a recipe, but next time I think we'll make the whole recipe and put it in a big tub.  Then, Elise can really get into it, and the mess will be slightly more contained.  I'm still finding dried-up chunks of cloud dough in random places around the house!

Monday, February 3, 2014

pink grapefruit play dough


In honor of Valentine's Day (which is only 11 days away!), we decided to whip up some pink, sparkly play dough!  We used a recipe from The Imagination Tree...

4 Minute Play Dough:
2 cups all-purpose flour
1/2 cup salt
2 tablespoons cream of tartar
2 tablespoons vegetable oil
1 1/2 cups boiling water

First, mix the dry ingredients together.  Then, add the wet ingredients.  Anna, from The Imagination Tree, suggests adding the hot water in increments until the play dough seems to be the right consistency.  She also says that vigorously kneading the dough is key.

At this point, Elise and I added a few special ingredients:

6 drops red food coloring (actually, I added this to the hot water before mixing it into the dry ingredients)
1/2 teaspoon rainbow glitter
1-2 drops grapefruit essential oil


I'm not much of a glittery, pink kind of person, but from the looks of it, Elise might be...  ;)


Elise played with her new play dough for over an hour - the only reason she stopped was because it was time for lunch!


If you're curious about how we have play dough set up on our art shelf, it basically looks like this.  ^^
Elise is really conscientious about getting out the vinyl mat and setting everything up - she still needs some assistance putting it all back, though...


I asked Elise to "smile," and this is what she gave me - oh, how I love her!  After we added the glitter, I told her she couldn't eat any more because it wouldn't be safe.  She cried for a moment, and then carried on with mixing the ingredients.  I never saw her eat any of the play dough after that.  I worried that adding the essential oil  would tempt Elise into having a taste or two, but I think it actually provided more of a good distraction - instead of nibbling, she was too busy sniffing!

Have a great week, friends!

Thursday, November 14, 2013

hot and cold: a toddler experiment

Elise is fascinated by hot and cold lately.  She loves watching the fireplace, and "hot!" is one of her favorite words to say.  We've also woken up to snow on the ground a few times, and Elise is beginning to sign "cold."  I decided to put together a simple hot and cold activity, so she could explore these two very different temperatures in a safe way.


I filled two identical tubs:
one with ice and one with hot water.

To get the ice, I poured water in the bottom of a tub, 
and popped it in the freezer overnight.

Elise was very cautious about touching the hot water!  

I didn't want it to be so hot it would hurt her skin,
 but I wanted it to be a little steamy and uncomfortable to the touch.


After her initial observations of the two tubs,
Elise started experimenting...

At first, it was fun to pour hot water onto the ice:
it made loud cracking sounds and broke into pieces.

Then, Elise dropped pieces of the ice into the hot water.
It was a challenge to fish them out before they melted!

We left the tubs out all morning, and checked on them every once and awhile.
It was interesting to see the ice melt and to discover that the hot water
was no longer hot, but actually kind of cold!

Have you done any hot or cold experiments with your kids?  Elise enjoyed this so much, I think we'll do something similar again soon.  Maybe ice in the bathtub?  I'm open for suggestions! :)


Thursday, October 3, 2013

naturally-colored play dough

After seeing the gorgeous, autumn-themed play dough over at Sixtine et Victoire (Seriously!  Play dough can be gorgeous - check it out.), I was inspired to make some with Elise. Although it was always one of the most popular activities in my classroom, I realized that Elise had Never. Played. With. Play. Dough.  

GASP!

Not only is play dough endlessly fun, it's also good for you!  I couldn't believe I'd been depriving Elise for so long.  

Here's a quick list of the benefits of playing with play dough:
  • builds fine motor strength
  • allows for open ended play
  • emotionally therapeutic
Read more about the benefits of play dough and discover some exciting variations at The Imagination Tree.  

Naturally-Colored Play Dough Recipe:

Over high heat, stir 2 cups water and 1 cup salt until salt is mostly dissolved and water is boiling.

To make yellow play dough, mix 1 cup flour, 1 tablespoon cream of tartar, and 1 tablespoon turmeric in a bowl.  Combine dry ingredients with 1 cup of the hot water and salt mixture and 1 tablespoon vegetable oil.  After it's cooled slightly, knead until a smooth dough is formed.  If dough seems too wet, add more flour; if it seems too dry, add more oil.

To make brown play dough, follow the same steps, replacing the turmeric with 1 tablespoon cocoa powder.    

Keep play dough stored in an airtight container between use, and it should last for a long time - unless your little one is like Elise and eats it all!  Ha, ha!  No, Elise didn't eat it all, but I was surprised at how much she actually put in her mouth considering it's so salty.


Thursday, September 12, 2013

cornstarch & water: an ooey gooey toddler experiment

Back when I was teaching, I totally embraced messy projects.  As a mom, not so much.  I think it's because all the naturally occurring messes are terrifying enough!  Or, maybe it's because my little daughter fearlessly eats anything and everything.  Either way, I've decided to throw caution to the wind, and try some ooey gooey projects with Elise while the weather's still nice.  Wish me luck!  ;)

Our first messy project:  cornstarch and water...

 
First, we filled a tub with cornstarch.  
The cornstarch itself was an interesting sensory experience.
It's SO slippery!

Next, we added some water.
If you try this at home, the ratio is 2 parts cornstarch to 1 part water.
(We weren't that precise - we just added enough water to make a thick paste.)

Then, things got a little interesting.
It wasn't quite a liquid, but it wasn't quite a solid...
It was OOBLECK!


Just in case you were wondering...
YES! Cornstarch and water make a delicious combo.
(According to Elise, that is!)
Related Posts Plugin for WordPress, Blogger...